In our last week of Embroidery we had another 15 samples to complete.
We also learned the technique Pin tucking. We learned how to use the three different feet with various sized grooves and which fabrics they each work best with.
With another technique to make use of, these 15 samples were much easier, similar to last week. Pin tucking was a nice change in technique as the outcome of the samples were very different to previous ones. Next week we move onto Hand stitching.
 |
| This is the largest grooved foot with a wool flannel material as it is very thick. I tried to create a pattern here which I think turned out ok however it could have been done a lot better.The semi-circle shape was hard to create but the grooves in the foot made it easy to follow. |
 |
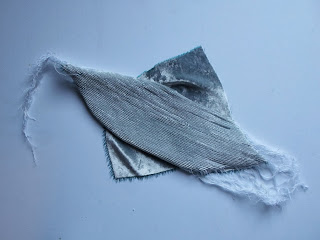
| This is the smallest groove of Pin tucking on velvet fabric. I really like the outcome of this, it did take a long time to make as each line was stitched individually but it really works. The material started to fold under itself, however I managed to iron it out and still leave a little but of shape, which I like. I decided to leave the ends of the threads hanging which I think works well. |
 |
Here I have used Pin tucking along the lines however it is hard to notice without feeling the fabric. There are raised areas that you cannot see in a photograph. This is just lines of pin tucking on different fabrics put together.
|
 |
| I really like this sample. It is a mixture of Pin tucking, Hair pinning and straight stitch. You can see the pintucking in the middle of the fabric because of the way it creases. The black fabric is a thick suade which is why this works well. |


No comments:
Post a Comment